Last month, one of my favorite blogs "A Girl and a Glue Gun," posted a fun marble maze. While in TN, I got to work craft-lifting it. I am adding a few more details that I find might be helpful.
Step 1: I use a rotary cutter and a self-healing mat to cut two 12 1/2" fabric squares. It can also be helpful to chalk a 1/4" line along the outside to save space for the seam.
Step 2: I use a chalk marker instead of "erasable" marker because when I make a mistake (gasp...yep), I can just use a tiny dab of water to get rid of it. I mark an X for the beginning of the maze.
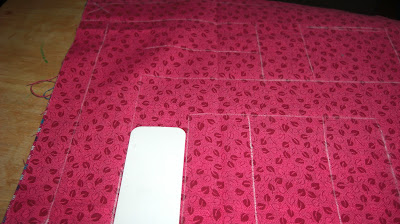
Step 3: The ideal width of the maze paths is at least 1 1/4". Fortunately, I find the perfect small ruler that is that exact width. LIFE.SAVER... I start with a straight path. Make a turn anytime you want.
Here is an example of how to make a corner. I did erase chalk mainly on the corners.
Step 4: I know on the agaagg site, many commenters asked for a maze template, but I found that if you find the correctly sized ruler, it really is not that hard to engineer your own maze. My main piece of advice is to NOT worry about the "extra, blank" space around your "successful path."
Step 5: Anytime I find extra space, I turn it into a visual maze of extra paths. Here is a rectangle of open space.
Step 6: Voila! Split the space with a seam, and you have more visual path lines. You can even erase some chalk to make the path usable as a dead end. (I should have done that...shucks.)
Step 7: After the successful maze path is done, mark the other end with an X. This ends up giving the maze two starts & ends on each side of the completed maze. I pick a spot along a straight path to mark where the seam should be left open for turning it out & inserting the marble. I fold the fabric up and mark the back, as well.
When the fabric is turned and is now good side to good side, you can still see where the turn out "pocket" is.
Step 8: I pin the four corners because I am not a perfectionist. Feel free to pin away. You do want to ensure that the fabrics line up, so the outside seams can be sewn at the 1/4" suggestion.
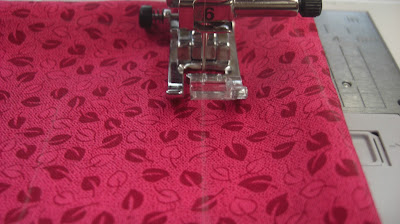
Step 9: Just like a simple pillow, I sew around the square stopping before I close up the turn around pocket. I like it 2-3 inches, so it is easier to pull the inside out. When it is pulled inside out, your chalk marks should still be there.
Step 10: I find my pocket and place a pin, so to be careful when I start to trace the maze with my sewing machine.
Step 11: Now trace away with your sewing machine. Yes, there will be quite a bit of start and stopping when tracing, and don't forget to clip all the threads when you are done. I use a light tan color thread that made one side of the maze easy and the other more difficult. I also use permanent marker to mark the start and stop points with a heart instead of an X.
Step 12: Insert marble into pocket, and sew it up.
Step 13: My daughter had a tough time at the start, so I "showed" her the maze by having her trace the path with her finger first. When the "aha" light bulb went off, she was pushing that marble around. Another good thing about this project is that my husband can use it on the plane ride home. Yes, I made a blue one for my son.
A few more ideas for this marble maze:
1. Time how long it takes to complete the maze
2. Do the maze with your eyes closed
3. Start with the marble in the middle and pick a particular X/heart to go toAny other thoughts?
Happy Belated 4th of July!
~hurley


it's awesome! and your instructions are fantastic! thanks for sharing!
ReplyDeleteI am glad you saw my craft-lift.
Delete