Continuing on with my holiday plates is one WITH a simple tutorial. I know you are shocked! Don't get too excited yet. I still probably should have taken more pictures, but you'll get the idea.
St. Patrick's Day Plate: (take one)
I loved the idea of a simple image and the date, if the holiday was true to that date every year, but something was missing this time. This plate has a shamrock from the Cricut Paper Dolls Dress Up cartridge and the number 17 in white vinyl. What else did it need?
St. Patrick's Day Plate: (take two)
I grabbed my box o' buttons and pulled out a variety of green ones. I did drop by a craft store to pick up some shamrock shapes because I thought that might add a little more fun.
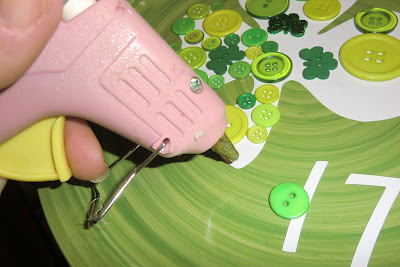
First, I started to lay down buttons without any adhesive just to see if I would like the end product. After I got over my desire to have them line up "perfectly" within the image lines, I was ready to stick 'em.
I pulled out my favorite mini, pink glue gun and rotated between placing glue on the image first and glue on the button first. The only concern ended up being that the hot glue "melted" the vinyl a little sometimes, but the buttons always covered that up.
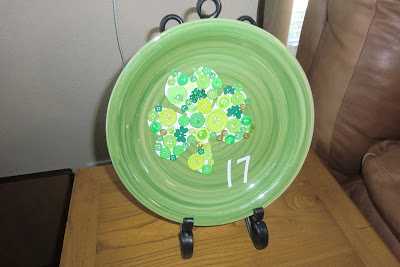
My final Saint Patrick's Day plate!!! I really like the way it turned out. It is still simple, but with a new flair. I look forward to pulling this plate out every March.Thank you for your patience on the directions for some of my projects. I am excited about getting better at explaining them. Sometimes I work on something thinking no one would care, so I don't take pictures. Now I am starting to take pictures regardless of whether someone would want to see them or not. :-)
Have a great day!
~hurley
Other Plate Posts:
Vinyl Plate Tutorial
Vinyl Plate Tutorial


