Tuesday, May 29, 2012

Basic Vinyl Tutorial (on a plate)

 I love vinyl plates, and I am finding out that many of you do, too. My other plates are listed at the end of this post. Today, I want to go step by step, showing my own tricks, on how to make vinyl images to adhere to pretty much anything. Vinyl of which I am speaking just means a "plastic" sticker. :-)

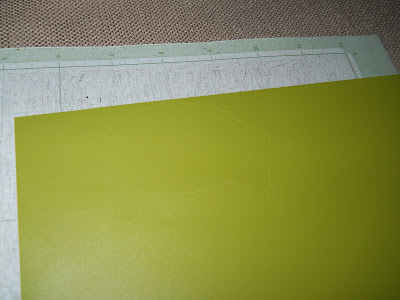
I purchase my vinyl in a mass order to save the most money. It also helps that I now have a pretty decent ROYGBV set to choose from. This morning I chose Ivy Green from Oh My Crafts. They come in 12 x 24 sheets, so I cut mine down to 6x12 to fit in my baby Cricut. (I still love my Cricut.)
When I am ready to apply it to my Cricut cutting pad, I make sure to apply the paper side to the sticky part of the cutting mat. The vinyl will be facing up. Make sure to rub the vinyl paper onto the mat to help with the adhesion.

(Yes, this picture was taken later to remind myself to tell you to rub it down.)
I then upload the mat into my Cricut using the settings: top dial 3, bottom dial 2 and blade 4. I have found this to be the best combo for cutting vinyl versus paper, etc. 

After the image is cut, I peel the vinyl sheet off the mat and then peel the "sticker" off the vinyl sheet.

For this vinyl project, I placed the turtle sticker on the plate in a lower, center position. 
After I Cricut cut out DZ, I decide the plate needed more. Out comes my punch. I like the sunburst and decided to use the same green and some scrap white vinyl. As you can tell, I just use the area outside of previously cut vinyls to use up as much as possible.

 Advice on punching out vinyl is to make sure the paper part is seen through the bottom of the punch. This ensures that the vinyl is getting cut out before the paper. The image you are punching out is more accurate this way.

Any punch (even scissors) can be used to get a shape out of vinyl. Another trick I have learned is that when you are ready to apply the sticker, there is a better way to "peel" the sticker off the paper backing. The photo below is horrible, but bare with me. Face vinyl up and use your nail to flick down. The paper backing will peel away much smoother. If you forget this hint, you'll most likely remember when it takes you ten times to separate the sticker from the paper. Trust me; this easily reminds myself to flip the vinyl up.
And the finished product! I stuck the starbursts around the plate and then as a cluster inside. Tooo cute! I made this morning for my sorority's silent auction charity fundraiser. I might even bid on it.
If the image you are cutting out is a word or multiple shapes you want to line up "perfectly," see my Use Contact Paper to Transfer Vinyl. It is cheaper than store/online transfer paper.
I hope this tutorial gives you a better idea of how to work with vinyl, and I hope you learn some time saving, money saving and frustration saving tips.
~ hurley

Other Vinyl Plate Posts:

Thursday, May 24, 2012

Great Garage Clean Out Challenge Week 3


Week 3
I am working on I'm an Organized Junkie's Great Garage Clean Out Challenge Week Three.

This week I have been adding to the purge pile and beginning to label it for my 9 June CommunityYard Sale. Basic tools I am using are masking tape and a sharpie.

If I have a set of things that go together I will use a numbering system like: 1/3, 2/3, 3/3 to make sure all 3 pieces are taken when purchased. The Bouncy House below has the house, blower and the stakes/patches.


If you look closely, I also labeled my old pink desk chair that UNFORTUNATELY does not fit in our current house. It reads, "IKEA $5." Sometimes my labels will only read a price, but other times, some details are added, which is easy with masking tape.  If a friend brings stuff over, they mark their prices with initials or a different colored sharpie. When their stuff is sold, I collect the money, remove the "price tag," and stick it to a clipboard or sheet of paper to add up later. That is MUCH easier and more polite than having multiple cashiers.

I look forward to more work in the garage next week.
~hurley

Previous Garage Challenge Posts:

A Bribe Book?


My kiddos are great subjects when a camera is around. They have beautiful smiles and fun poses.

 That is.......MOST of the time. They can also be pretty nutty in front of a camera. Sometimes it is because they WANT to be silly:
pull-up head twins
 opposite day
 be a pet
gotta brush
mr. cyclops
bath star


Sometimes it is the result of some "poor" decisions that I catch:
tantrum
tantrum (I have a better one somewhere)
huge "funny" sneeze booger (sooo gross)
fingers in the mouth (busted)

Enter.... the "Bribe Book."
This is something that I have always thought about in jest. I recently had the idea of actually putting one together. Many moms talk about pulling out the baby pics/silly pics when their kids start dating, but I have not "seen" it in action. Come on, moms. Enough with the threats! Gather those pictures and DO something with them. :-) Stay tuned for my future progession in actually putting this idea into action. Even if I never pull it out to really embarrass my kiddos, don't you think the "threat" would be more real? Actually, I will most likely show my kiddos the book monthly or so to try to avoid future "inappropriate" photos. What do you think?

Have a Great Day!
~hurley

Use Contact Paper to Transfer Vinyl

I am so in love with vinyl. I know a lot of people are now using the Silhouette, but I still love my Cricut. I like being able to carry it around with me and not need a computer to use it. I DID use Craigslist to "upgrade" to the 12 inch Cricut, so I am excited about learning the new tricks to that. Yes, I am a slow technological advancer when it comes to money. I don't even have a smartphone yet. I call mine a dumb phone, but.... it can text. :-)

As for vinyl plus plates, I am in love, as well. See some of my Plate Collection here. Today, I want to show a simple tutorial based on transfer paper with vinyl and not necessary the actual project you are choosing to do. Vinyl attaches to almost about anything. My awesome, crafty friend Robin has not entered the world of vinyl yet, so I am hoping this will help a little to convince her that it is really not that hard.
Wedding Plate Gifts

CONTACT PAPER AS TRANSFER PAPER TUTORIAL
Instead of purchasing "original" transfer paper, I like to save money and use contact paper. You do have to tweak it a little, but it is so worth it.
1. Cut a piece of contact paper that will cover your design or words. Peel it off the backing and press sticky side against your shirt/pants to rid itself of "too much sticky."
2. Then stick it on your vinyl design, rub the design through the contact paper and lift design off.
3. Place it on your project where you want to line it up. (Sorry, no picture.)
4. Rub the vinyl design onto the project, so that it sticks to your project and not the contact paper anymore. This is why it is important for the contact paper to not be too sticky. Sometimes the vinyl will lift with the contact paper like below.
 5. Rub that part onto the project again, and it should be fine. If not, use your fingernail to "peel" it off the contact paper, and next time peel and stick the contact paper against your shirt more. :-)

6. Continue to peel the contact paper back to reveal a well positioned design on your project.
I hope this tutorial makes sense and can help some people. Robin, how did I do? If anyone has any questions, feel free to ask. I answer all my post questions.
Google "vinyl projects" and have fun!
~hurley


Thursday, May 17, 2012

Ping Pong Anyone?

Living in San Antonio, we don't have a huge need for indoor activities since we don't have too many rainy days, or snowy ones for that matter. We do like to escape the heat a bit though, so we do a lot of crafts, etc. Last month we came up with a fun, active and safe indoor activity that ended up costing NOTHING.
We had the beach paddles already, but you can use racquetball, badminton or other type paddles. We used a lightweight yet bouncy plastic ball, but we also progressed into using the paddles to keep a balloon in the air. They had a blast. I did leave the tape there for about a week, but with painter's tape, it was very easy to remove

Do you have any super easy, quick games for inside your house during rainy days?
Have a great one!
~hurley

Wednesday, May 16, 2012

Great Garage Clean Out Challenge Week 2

Week 2
I am still working on I'm an Organized Junkie's Great Garage Clean Out Challenge. It was important to make a plan for the garage, purge and separate/ put together like items with like items.

1. I measured the shelves and other larger things in the garage using my own feet.


2. I then tried to draw out the garage with the stepped out measurements.  Definitely not to scale, but close enough.

3. I drew a general picture of WHERE things might go. Sooo much. (Some of this "overload" is due to some lackluster indoor storage.

4. Here is my purge pile. It is in a line where my car would be, so after the Yard Sale I can celebrate by parking inside.

5. I covered our air hockey table with a moving blanket, which will NOT be moved outside. :-)  I put all my kitchen ware that does not fit inside our kitchen on the table to sort and then re-shelve.

6. Another "pile" that did not go outside was our holiday decorations and our tall bookcase of future games & books for the kiddos. I did take down all the boxes and restock them according to holiday. Some shelves were swapped out for others to use the space most efficiently. It seems so much more peaceful. As for purging more from within the boxes, that will continue throughout this year's round of holidays. I feel it will be easier to do holiday by holiday.

7. Outside piles included bikes, scooters and sports items.

8. I made an outside pile of our folding tables, chairs, extra winter blankets, box o' bags (i love bags) and 2 old computers. I need to give myself a deadline to get information off of the two hard drives or it won't happen.

9. I also have 3 clothing racks (great to hang up costumes and for jackets during birthday parties), winter gear, jackets, hangers, and clothes the kiddos have outgrown.

10. Granted this 2 bike rack is inside, I still have to figure out how to organize 3 adult bikes, 2 kid bikes and 2 scooters. I KNOW a lot of us have this problem. Maybe someone will come up with the perfect simple solution that allows: limited space usage, easy access of bikes by adults and kids alike, and a low price tag.  Any solutions yet???? Anyone???


Good luck to us all!

~hurley

Previous Garage Challenge Posts:
Week One

Friday, May 11, 2012

Holiday Plates Series: Mother's Day & Father's Day

My Holiday Plate collection is growing!! I am so excited. Each one is taking on a life of its own. It will be interesting to see if I "edit" them next year. So far vinyl is the main ingredient, but I did add buttons to the St. Patrick's Day plate. Any ideas for other interesting, yet simple, embellishments?

Mother's Day:
I think I want to jazz this one up for sure. Maybe it is just that the font is too small, but it will change. Granted, I have 2 more days to leave it up, so "no one forgets" about Sunday. Maybe I should install blinking lights around the plate...Hmmmm.

Father's Day:
I found this fun square plate at the Dollar Tree and decided to use aqua and brown vinyl. I look forward to setting this one out. Hubby has been very patient with my new plate addiction.

Tah-Dah!!    Is this "manly" enough? :-)

When I started this project, I used this simple basket for storage.

Here is my Box of Plates I use now. It is a very sturdy plastic file box with a handle. I am going to vinyl label the box "Holiday Plates" on the side someday. I also have plates in here I have found, but not decorated yet. It looks like they will all fit.

Happy Mother's Day to all you mommies out there, and don't forget to call your own mommy!
~hurley

Other Plate Posts:
Vinyl Plate Tutorial
Holiday Plates Series: Valentine's Day & Thanksgiving
Holiday Plates Series: Saint Patrick's Day